Step-by-Step

Place, trace, rotate and trace again to create the ColourJot Circle.

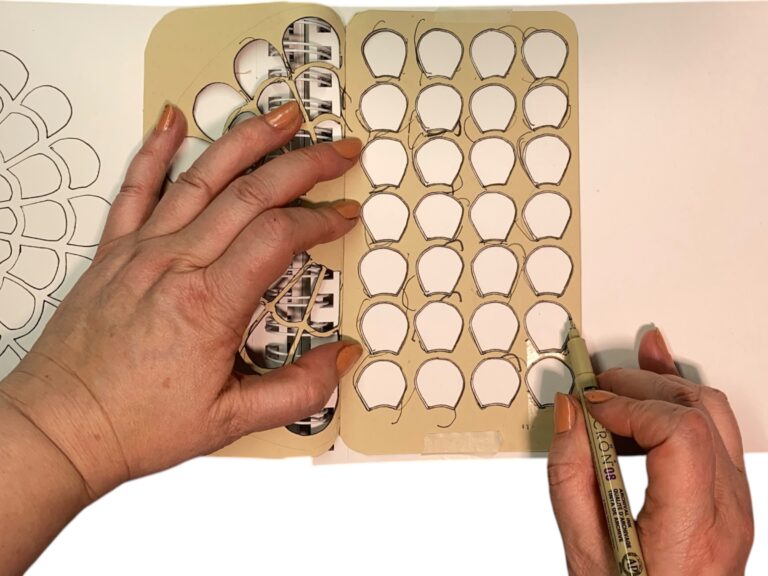
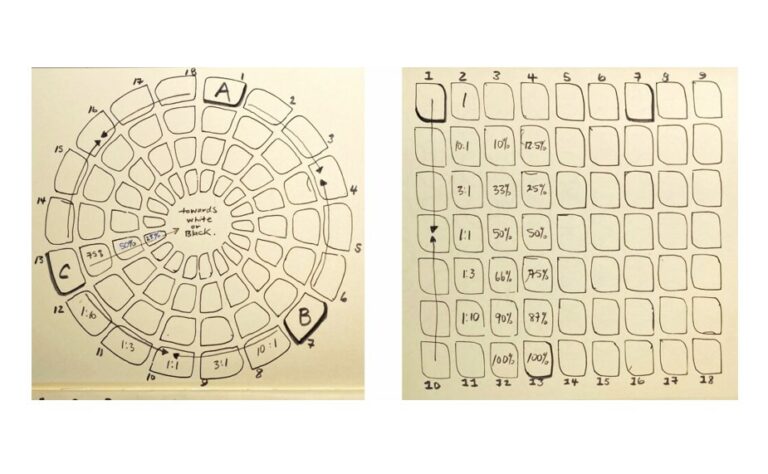
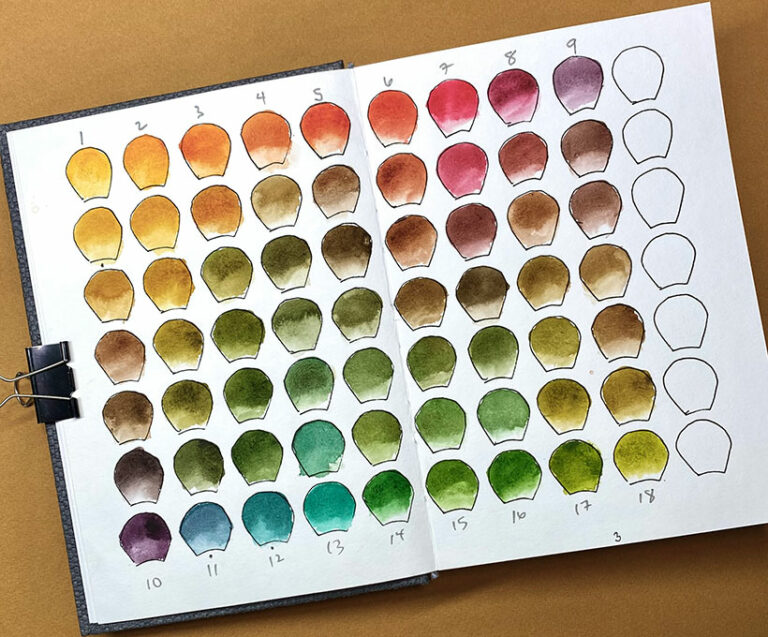
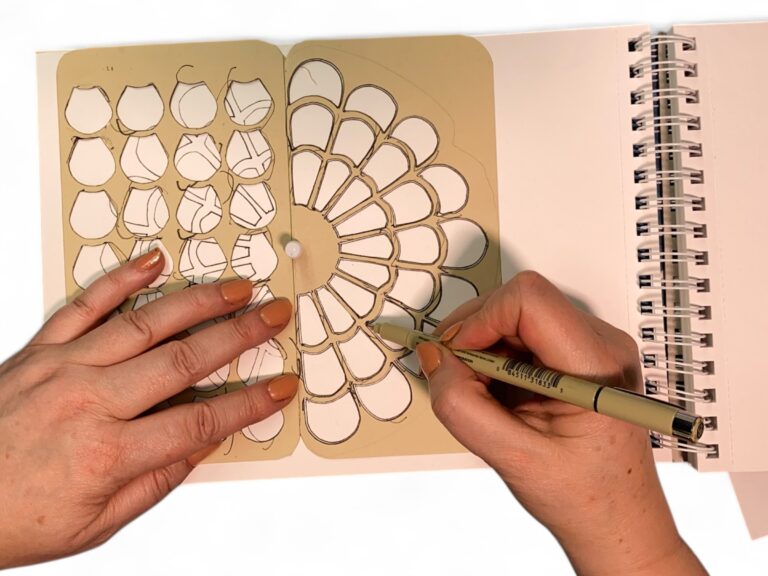
5: Trace the ColourJot Circle

Here are quick step-by-step to trace the colour circle side of the ColourJot Template. 1. Position the stencil squarely on the page. Use the top of the stencil to align with the top of the book and the bottom of…

Position, trace, slid over, and trace again to create a 7 H by 9 W grid for ColourJot

6: Trace the ColourJot Grid

The ideal ColourJot arrangement is 7 rows high by 9 columns wide. The template will be traced, repositioned, and traced 3 times to accomplish this layout.  1. Position the stencil squarely on the page. Use the top of the stencil to…

7: Label & Number ColourJot Designs

The key to success, in building a good ColourJot reference book, is having standardized numbering and labeling. During our in-person courses, it was discovered that is was easier to track of the placement of colour mixes when the spaces were…

8: Add Colour to the Circle

Choose any three colours and paint them straight from the tube colour into the appropriate space labeled 1, 7, or 13. These are prime numbers and so this is where we put our prime colours. The key to colour-mixing is…

9: Adding Colour to the Grid

The grid may be traced over two pages to fit a basic sketchbook (A5, 5×8”, 5.5×8.25”) or a medium accordion book. 9 columns across and 7 rows high fit easily on a 2-page spread or accordion book. Take note of…